Everyone seems to be doing it so why not us too. We got our hands on a second hand warhound and there’s no way I was turning down a chance at a major project like this. It’s a big project. It’s taken almost a year to get this big hound dog on the tabletop but after a lot of late night painting sessions with the Brohammer crew on discord it’s finally ready.

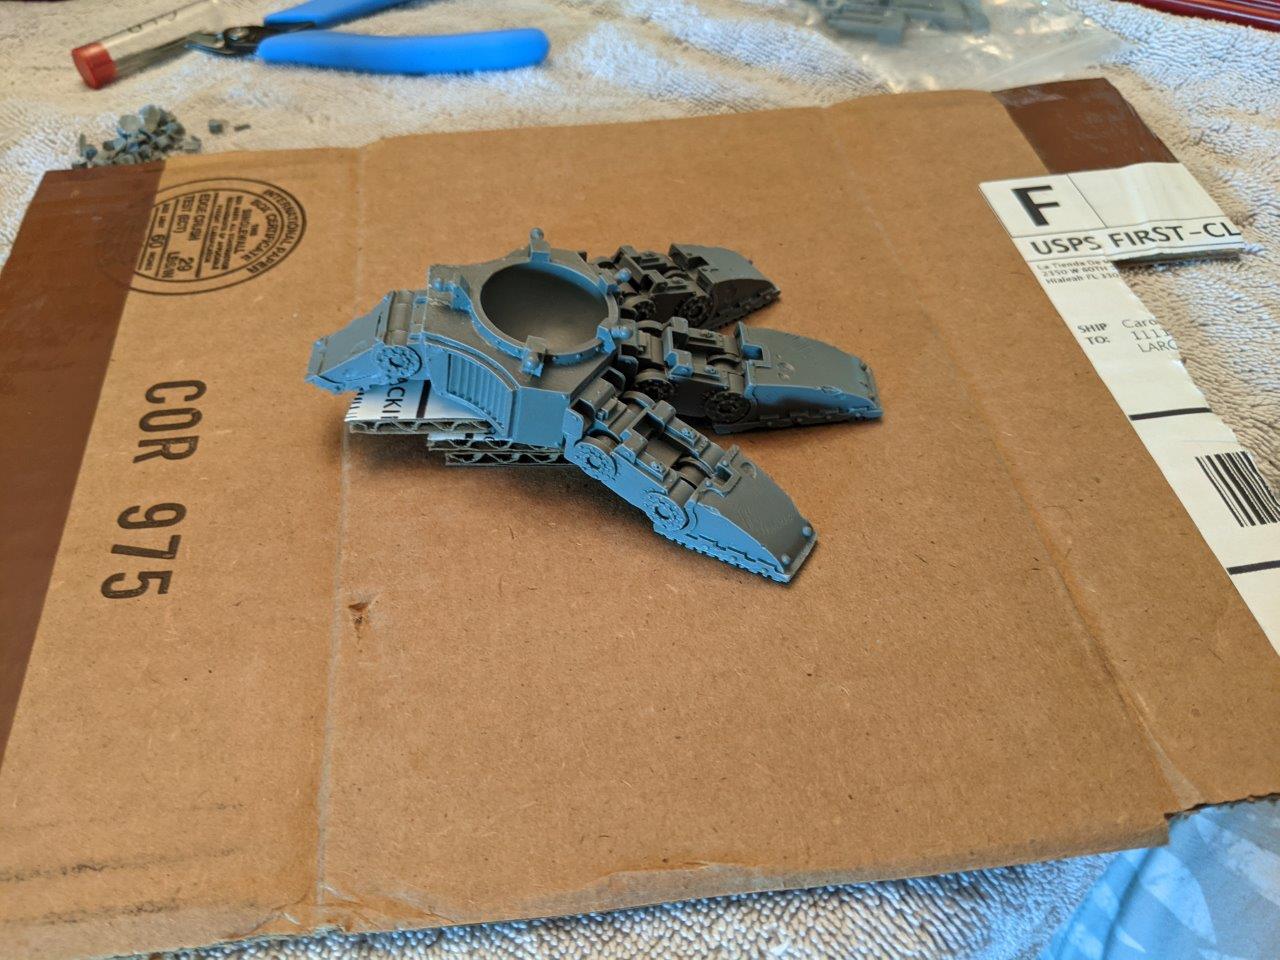
Where we started! Gotta cut up all the sprews and get all the resin ready to take paint. This took way longer than I figured it would. I can’t imagine how long they must have spent behind the scenes on all those youtube shows building these titanic models. I didn’t even begin putting the pieces together for 3 nights of prep work. But as you can see I couldn’t help but lay out the feet.


It started to sink in why all the other warhound titans I saw online had the feet on some kind of base to be able to balance the model with a dynamic pose. I figured with enough glue anything is possible, glue and epoxy putty.

Finishing all the prepwork the goal was in sight but I had no idea how much more was ahead. Having just read the Mechanicus book kept me enthusiastic, so with my spirits up I soldiered on with the work.


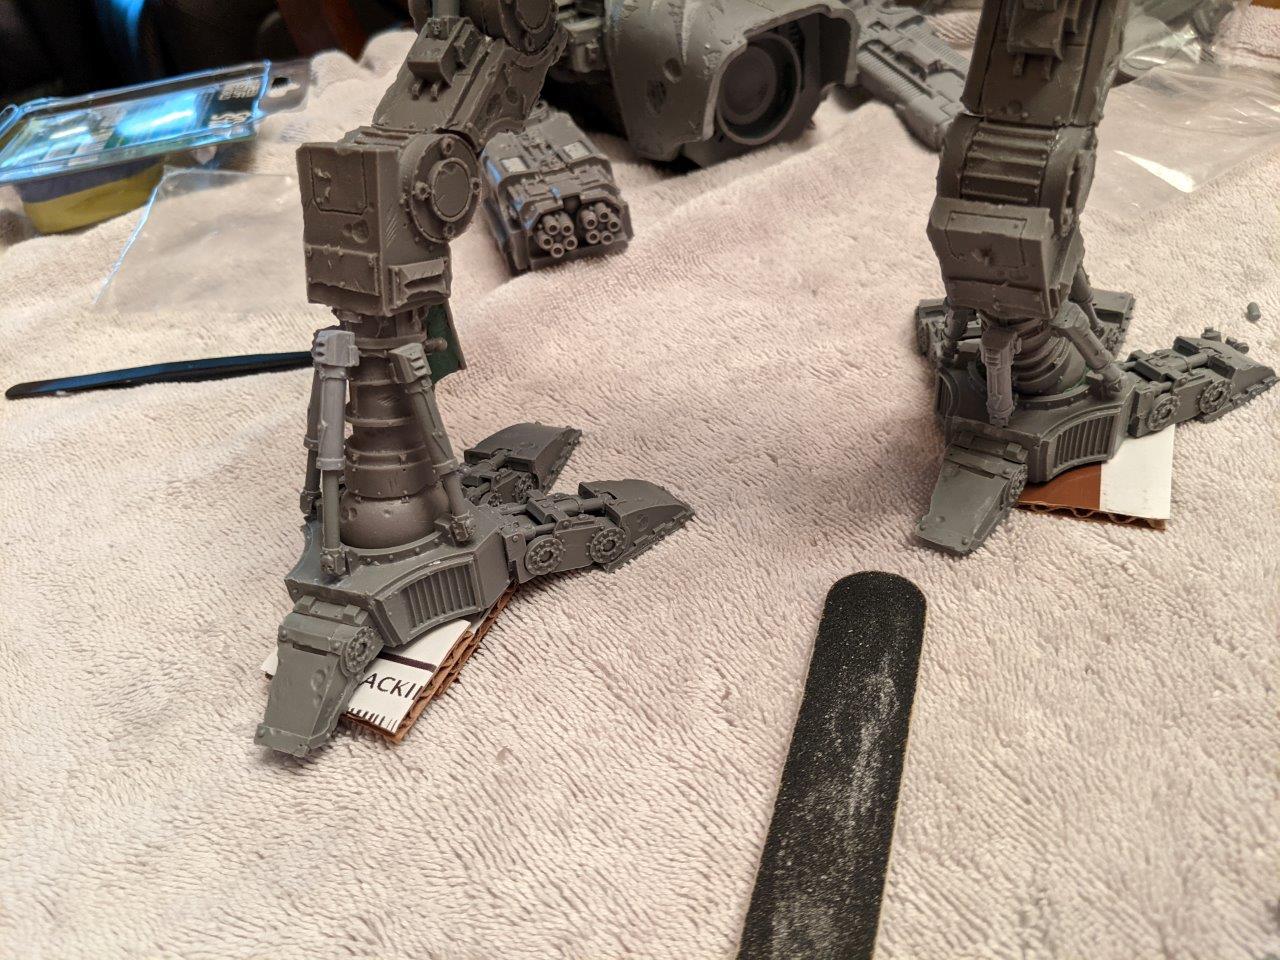

I put the feet together with cardboard cutouts underneath to let them sit in place while the glue and greenstuff set up. This worked out really well but I did have to get away from my resin dust catching towel because I needed a hard surface for the feet to sit on. Once all the little pistons were put in place I moved on to posing the legs.
I don’t have any great tricks here, other than I put everything in place roughly using my 4 hands to hold everything together. Once I had a decent idea what I wanted them to look like I tacked them together with epoxy putty which would give me a little work time before it set up then I could recheck everything’s fitment.
Don’t glue the balljoint into the feet or pelvis at this point. I let the legs set up with them laying on a table. The final adjustment to the pelvis position/level is made when the legs are ready to have the ball joints fixed in place. When you reach that point you should use plenty of glue to fit the balls in place. I used green stuff around each of the balls in the feet.

I repeated the process for gluing the arms on that I used for the feet with green stuff around each of the balls in order to ensure a good secure connection. The torso wasn’t glued onto the legs for this part. I posed the arms with it sitting on the legs then moved the torso to the table and braced the arms for the glue to dry.
Final step before painting was to glue the torso onto the legs.
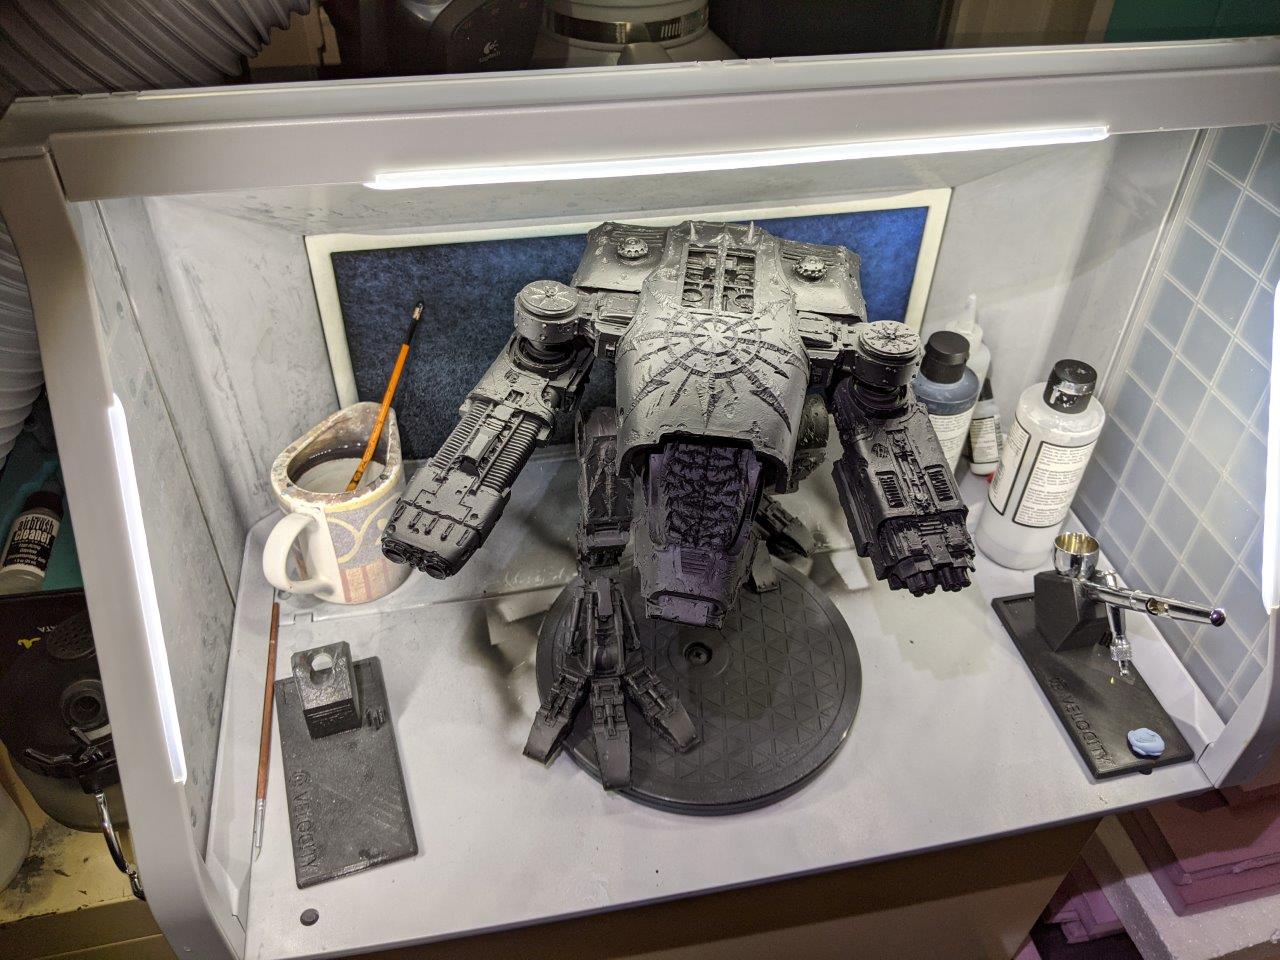
Priming time! My airbrush booth barely fits this monster model in it. I would not recommend trying to paint a model this size with a brush.
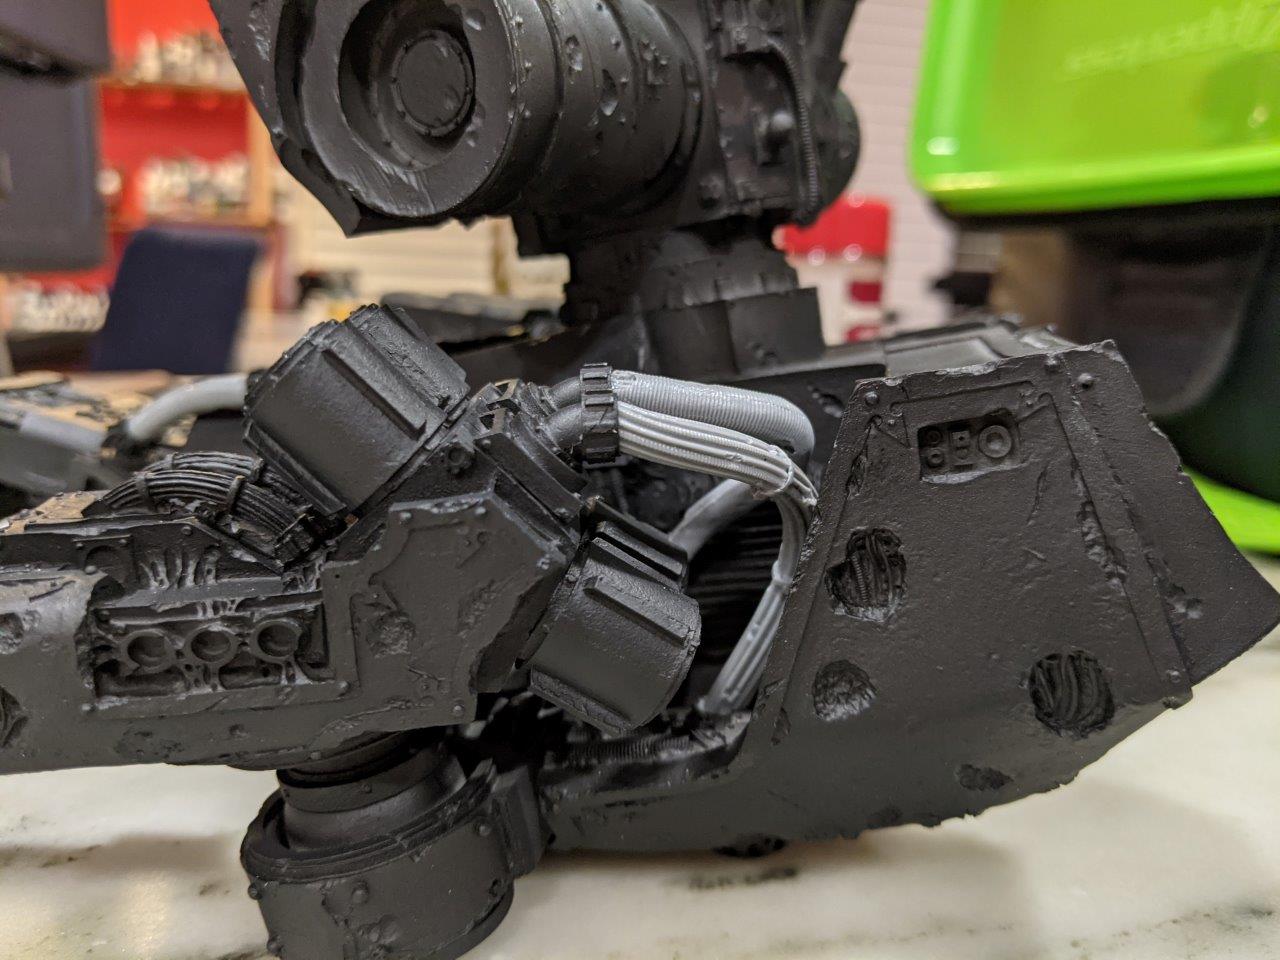
Attaching the cables to the arms and the head was quite a challenge too. I’ve done some resin shaping in the past, usually to fix a bent weapon, this was way more involved. I boiled water and left the resin cables in the water long enough for them to saturate with heat then I bent them roughly to shape. They were way longer than I needed for my pose, so I then cut them to the length I needed. Then I put them back in the water and they completely lost their shape then I had to bend them back into shape again. There was quite a bit of back and forth, but eventually I put some superglue on the ends and put them in as best as I could.
They turned out mostly alright.

Painting time
Step 1 Zenithal highlight
Step 2 Bolt Gun Metal for all the mechanical parts
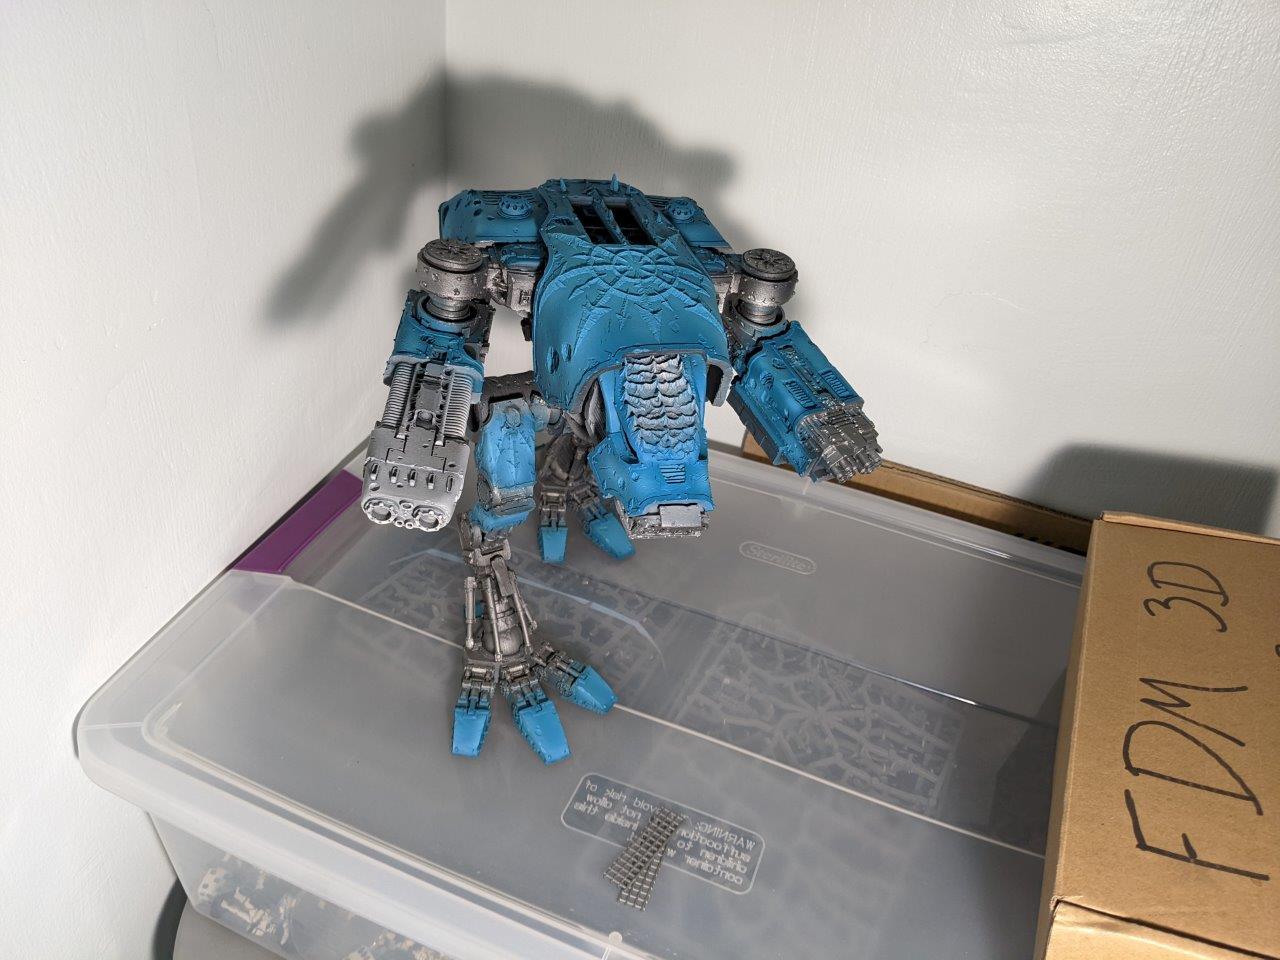
Step 3 Thousand Sons Blue, Ahriman Blue, White mixed into Ahriman blue to taste. I followed the zenithal highlights for this effect.

Step 4 Experimental Oil wash. I took a big chance and mixed up an oil wash using turpentine and an oil based paint. I painted this over all the silver parts to get a nice wet oily look. It turned out great but the paint took over a week to fully dry, so if you’re planning to follow in my footsteps be prepared by practicing on a smaller model.
Step 5 Retributor Armor Gold followed by Reikland Fleshshade wash
Step 6 Accents the yellow for the head was Averland Sunset with a second coat of Yriel Yellow. The plasma rifle is Model Color medium blue mixed with white for the glow then I did an edge highlight of model color Deep Sky Blue and white. The muzzle burn is done entirely with washes.
You should be patient and wait for them to dry before using the next color for a smoother transition than I got.

Final step. Take your new titan to the local game store to get some photos and hit the brakes just a bit to hard when turning into the parking lot.
It was actually way more stressful to get this fixed than to build it right the first time. I think I only tacked the ball joints in place with superglue. I would recommend using the greenstuff method that I used on the arms and feet joints to keep this from happening to you.